On this page, you will learn more about protocols.
Open the app and make sure you’re on the Browse page.
For example, let’s explore a protocol from trauma surgery. Scroll down a bit and click Trauma Surgery, then click on the Ankle Fracture Open Reduction and Internal Fixation protocol. Here you'll find a list of surgeons performing this procedure, along with the standard protocol and the Curated by Incision section. For this example, we'll click on Dr. T. Graham.
1. Understanding the Protocol Format
Each protocol follows the same format:
Your personal notes
General Information
Anesthesia
OR Setup and Patient Positioning
Materials
Draping
Surgical steps
Additional information
Postoperative instructions
The orange dot signals a specialists preference different from the standard protocol.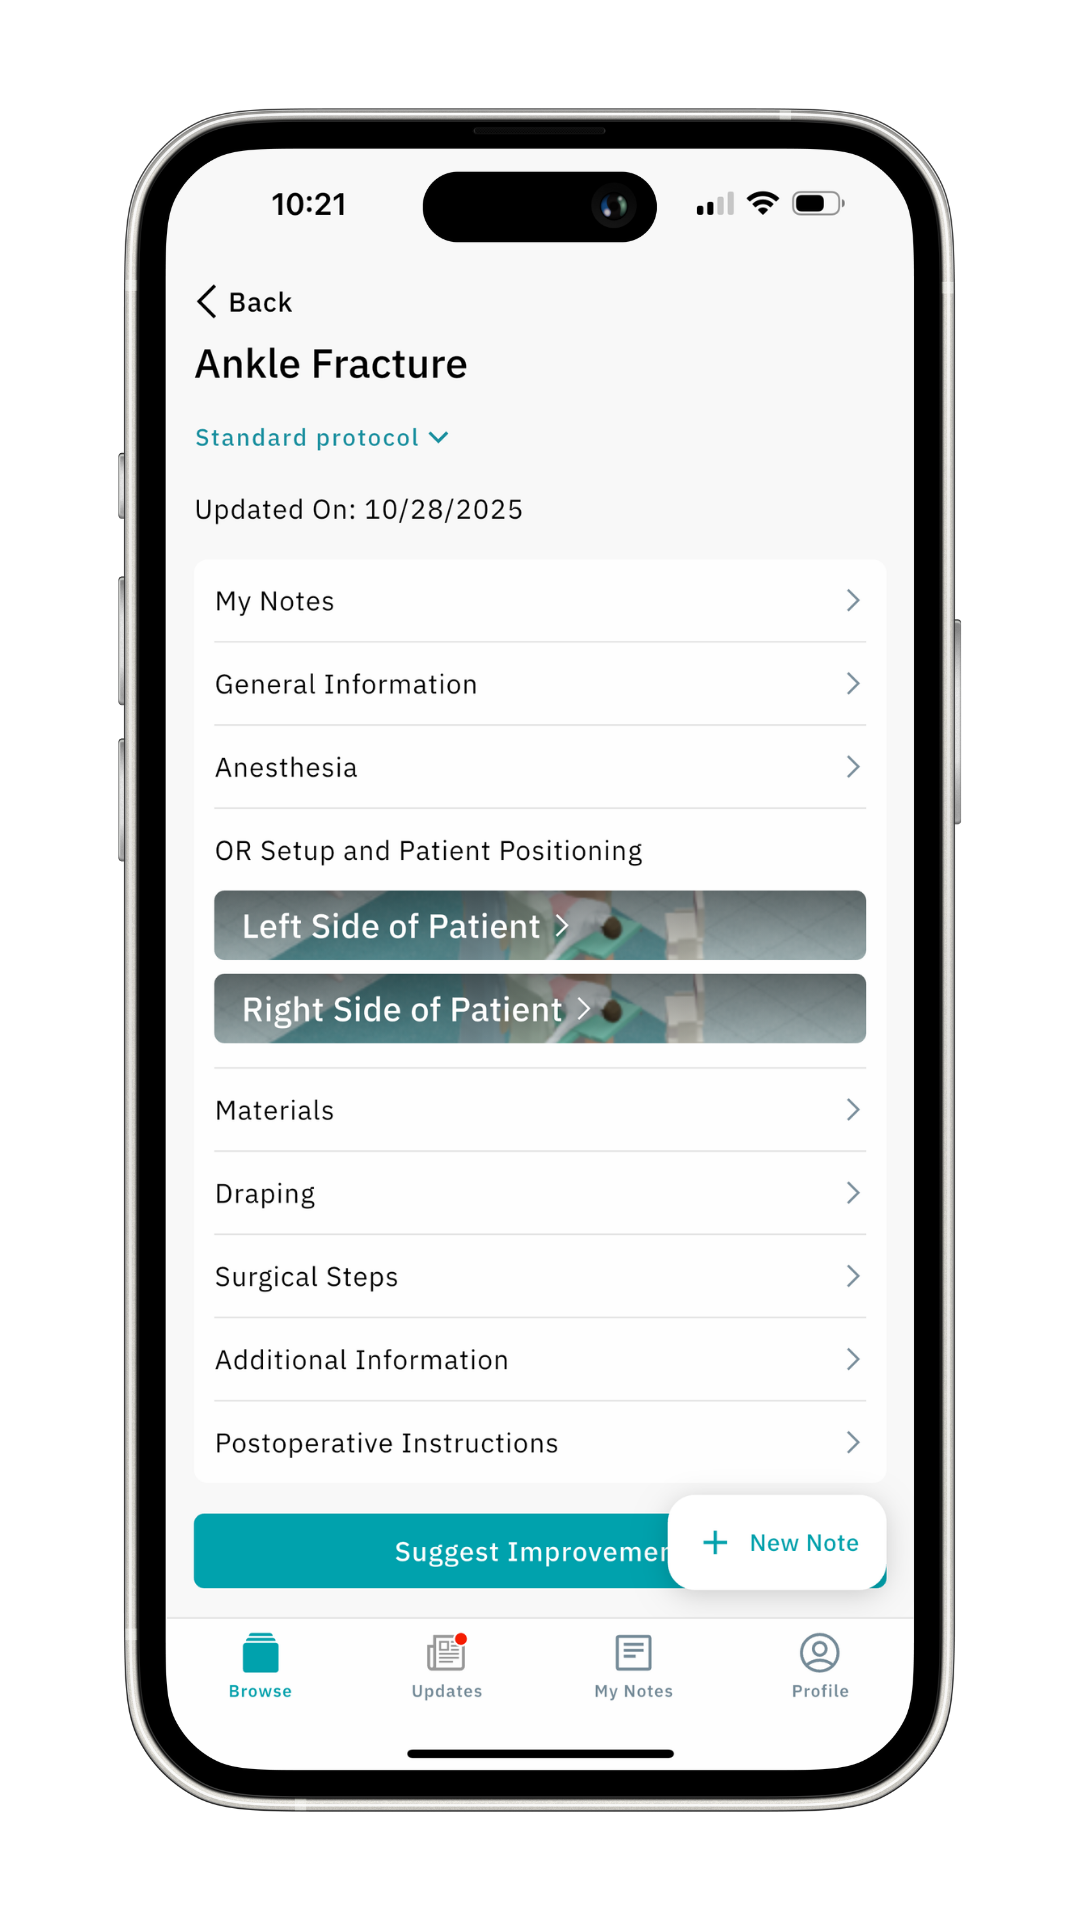
We have covered the Notes and Feedback features in a separate article.
Click here to learn more about the My Notes section.
Click here to learn more about the Feedback feature.
2. General Information
Clicking on General Information provides details about the procedure. To go back, click the arrow on the top left.
3. Anesthesia
Clicking on Anesthesia provides details related to anesthesia about the procedure. To go back, click the arrow on the top left.
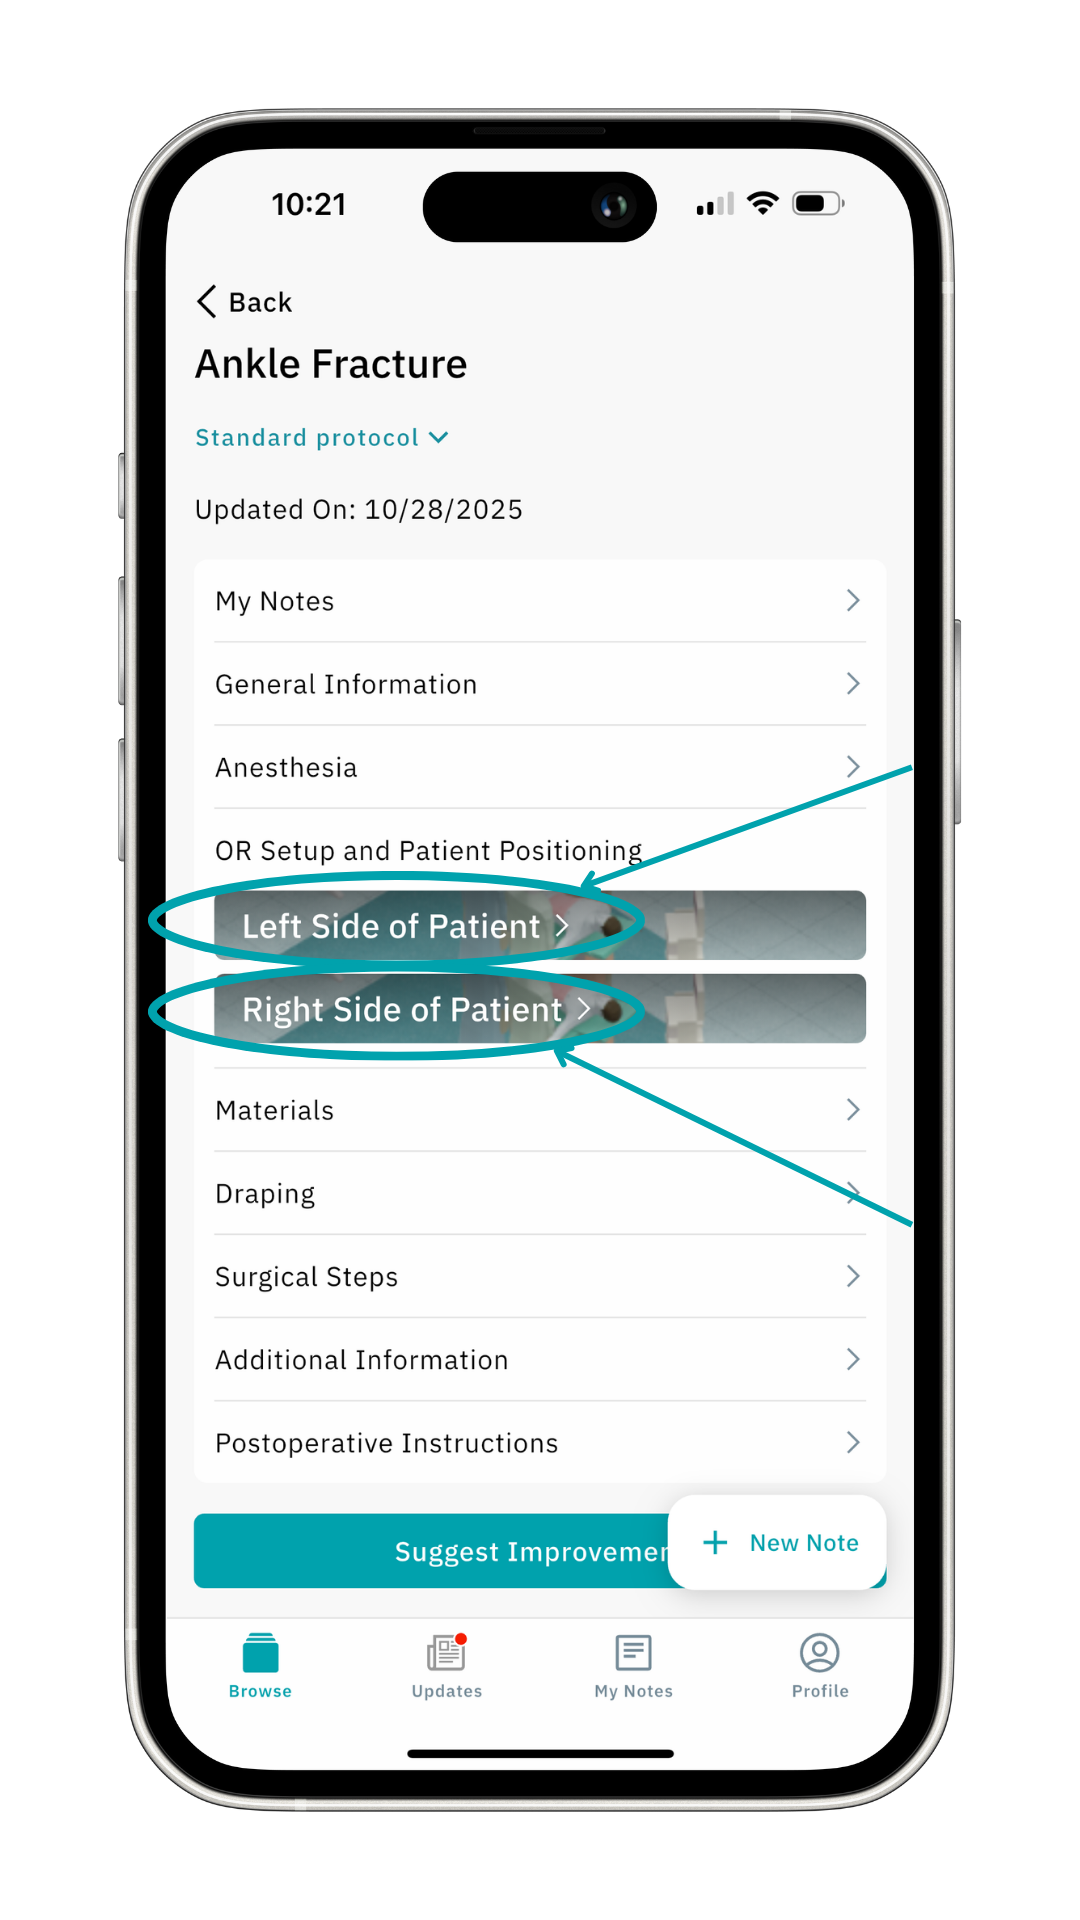
4. OR Setup & Patient Preparation
Some procedures can be performed on either the right or left side of the patient. For this reason, some protocols include both the left and right sides. For procedures where this does not apply, you’ll see ‘Side not applicable’. For this example, we’ll click on ‘left side of the patient’.
You can switch between patient positioning and room setup in the middle of the page.
An exciting feature of the Incision Assist app is the 3D visualization of the OR setup.
Click Navigate in 3D to experience the operating room and patient setup in an interactive 3D environment.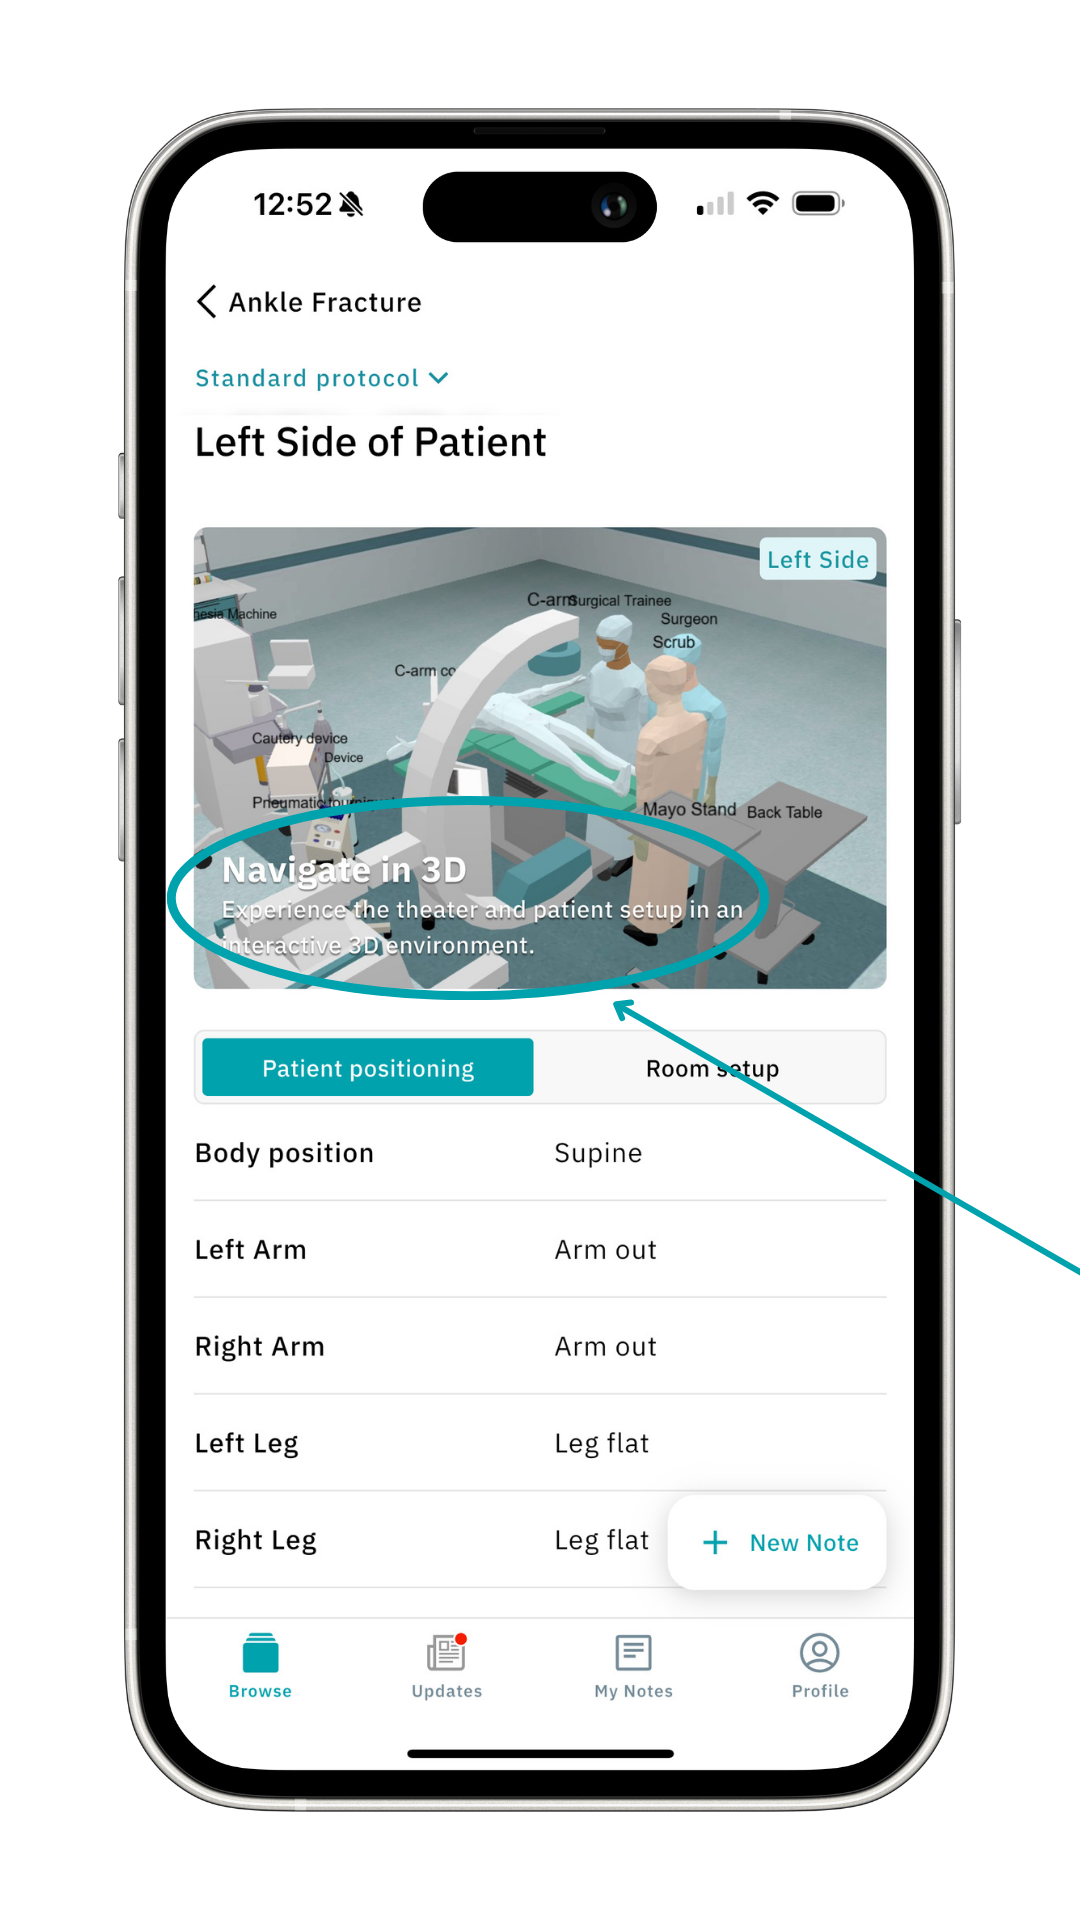
You can now see the OR setup and patient positioning in 3D, specific to this procedure and specialist. Swipe your finger to turn the 3D model as you wish. Pinch the screen to zoom in and out.
Click Patient at the bottom right to focus only on the patient positioning.
Click the arrow in the top-left corner (<) to return to the patient positioning and OR setup for this procedure.
Click the arrow in the top-left again to return to the protocol overview.
5. Materials
Click Materials for a rundown of all the items needed for the procedure.
The order of the list is based on your hospital’s preference cards.
You can change the order by switching between Default Order, By Category, and Hold. This helps you quickly identify whether an item is optional and, for example, can remain unopened.
Where possible, each material includes an image, so you know exactly what to look for.
As mentioned earlier, you may also see orange dots next to items in Materials. This indicates that the specialist has a specific preference. 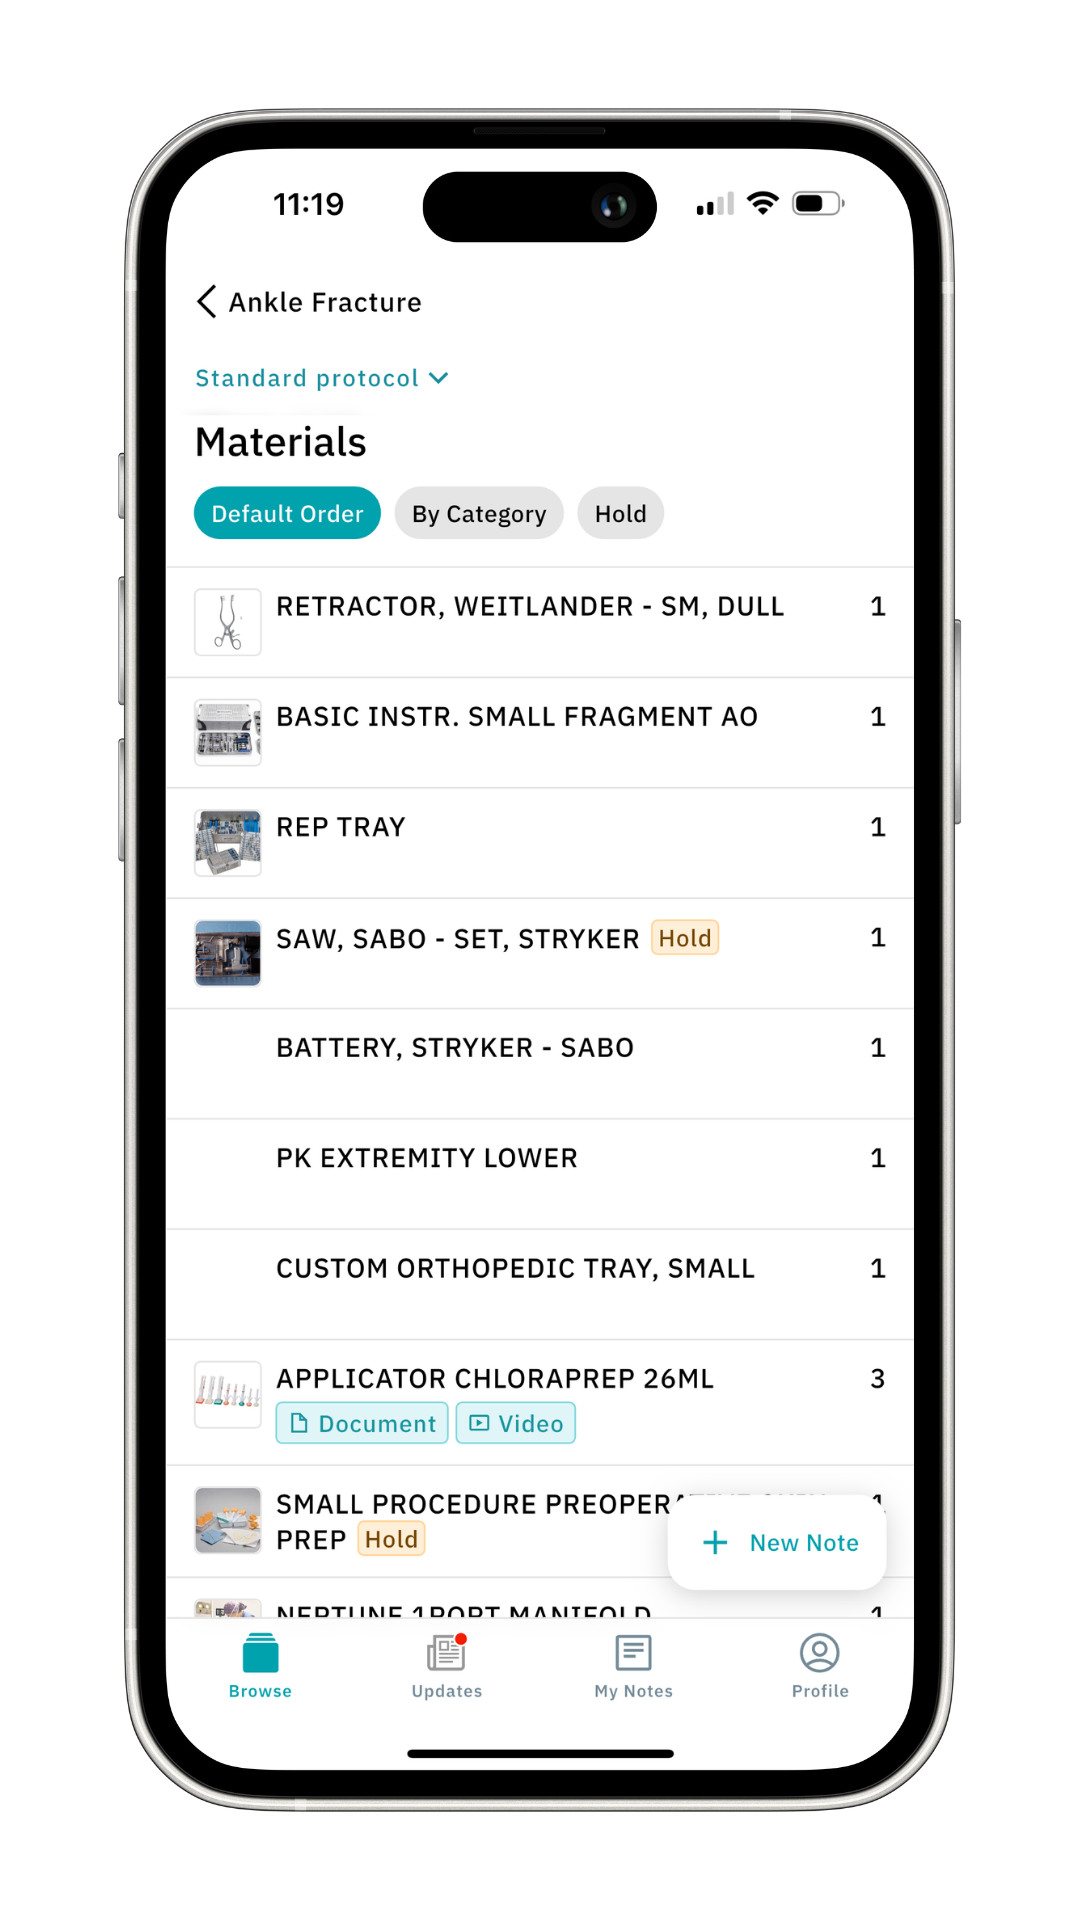
Click Back to return to the protocol page.
6. Draping
Click on Draping to see how the patient should be draped. Hit the back button on the top left to return to the previous menu. 7. Surgical Steps
In the Surgical Steps tab, you can find a detailed explanation of all the steps of this procedure, including images and hyperlinks. Hit the back button to return.
8. Additional Information & Postoperative Instructions
Click Additional Information and Postoperative Instructions to ensure you’re well prepared for the procedure and know what to do afterward.
9. Suggest Improvement
An essential feature is the Suggest Improvement button at the bottom of each page in a protocol.
Here you can suggest a change, whether it’s a specialist's preference, a material update, or if you’ve spotted a bug in the app.
Click Suggest Improvement, choose an “About” subject, describe the change, and hit Send feedback.
Your feedback goes to your team lead/key-user for preference card-related changes or to Incision for technical feedback.
 Check out our other articles for insights into the Devices section, Anatomy Models, Updates, and My Notes.
Was this article helpful?
That’s Great!
Thank you for your feedback
Sorry! We couldn't be helpful
Thank you for your feedback
Feedback sent
We appreciate your effort and will try to fix the article